Dive into Roblox Studio lighting presets, an essential tool for creators aiming for stunning visuals without endless tweaking. Discover how these pre-configured settings can dramatically enhance your game's atmosphere, optimize performance, and save you valuable development time. This comprehensive guide explores everything from applying basic presets to customizing advanced lighting effects, perfect for busy US gamers and developers balancing their passion with daily life. Learn to leverage these powerful features to make your creations stand out in the bustling Roblox universe, ensuring your game not only looks professional but also runs smoothly across devices. Stay ahead of the curve with insights into current trends and best practices for realistic or stylized lighting, making your development journey more efficient and enjoyable. Whether you are building an immersive role playing experience or a competitive obstacle course, mastering lighting presets is a game changer for visual quality and player engagement in 2026 and beyond. Get ready to illuminate your creations like never before.
Related games- Guide Amelias Hair Roblox Find Your Perfect Avatar Style
- Guide to Roblox ForgottonDoyle: Uncovering the Mystery
- Guide to the Blue Convertible in Roblox: Get Yours Now!
- Guide to Roblox Shattervast Script Explained
- Guide How to Get Toyota Cars in GTA 5
What are the best Roblox Studio lighting presets for beginners?
For newcomers, 'OutdoorAmbient' and 'ShadowMap' are great starting points. OutdoorAmbient offers a natural, bright feel while ShadowMap enhances shadows for depth. Experiment to see how different options immediately transform your scene, providing a solid foundation before diving into advanced adjustments. These allow busy US gamers to quickly achieve appealing visuals.
How do I make my Roblox game look realistic with lighting?
Achieving realism involves a blend of properties like GlobalShadows, ensuring shadow detail, and ColorCorrection to adjust atmosphere. Utilizing presets that lean towards 'Future' or 'Voxel' lighting technology as a base, then fine-tuning environmental properties such as Brightness, ExposureCompensation, and SpecularScale, creates believable lighting scenarios. Proper use of PBR textures also dramatically enhances realism.
Where can I find advanced Roblox lighting settings in Studio?
Advanced lighting settings are primarily located within the 'Lighting' service in the Explorer window. Select 'Lighting,' then in the Properties window, you will find extensive options under categories like 'Atmosphere,' 'Blur,' 'ColorCorrection,' and 'DepthOfField.' These allow granular control over fog, color grades, and focus effects to craft unique visual experiences.
Can lighting presets improve my Roblox game's performance?
Yes, properly chosen and optimized lighting presets can significantly improve performance. Simple presets with fewer complex effects (like less intense blur or lower quality shadows) render faster. Balancing visual fidelity with performance is key, especially for mobile players. Regularly test your game on various devices to ensure a smooth experience for a broad US gamer audience.
What's the difference between 'ShadowMap' and 'Future' lighting in Roblox Studio?
ShadowMap is a traditional lighting engine that offers good performance with static shadows, suitable for most games. Future is Roblox's most advanced physically-based renderer, providing highly realistic dynamic lighting, global illumination, and ray-traced shadows for stunning visuals, though it can be more performance-intensive. Future is best for high-fidelity experiences.
How often should I update my game's lighting to stay current?
While there's no fixed schedule, consider updating your game's lighting whenever Roblox introduces new lighting technologies, features, or significant engine improvements. Additionally, reviewing lighting for seasonal events or major content updates can keep your game feeling fresh and modern, aligning with visual trends that attract a broad US gamer base.
Are there any free Roblox Studio lighting asset packs I can use?
The Roblox Developer Hub and the Creator Marketplace offer numerous free resources, including community-made lighting configurations and example places that demonstrate various lighting setups. While not always 'presets' in the built-in sense, these provide valuable starting points and inspiration. Always check licenses for community assets before integrating them into your projects.
Are you a dedicated gamer or developer who loves creating worlds in Roblox Studio, but often find yourself wishing for more hours in the day to perfect every detail? We get it. Balancing a job, family, and personal life while still pursuing your passion for game development can be a real challenge. You want your Roblox creations to look amazing, captivating players with stunning visuals, but spending endless hours tweaking every single lighting property can feel daunting. You are not alone. According to recent US gaming stats, 87 percent of gamers regularly dive into their favorite titles, often dedicating 10 plus hours a week to their passion, even while balancing a 9-5 job and family commitments. Many value relaxation, skill building, and social play, meaning they seek efficient ways to achieve high quality results.
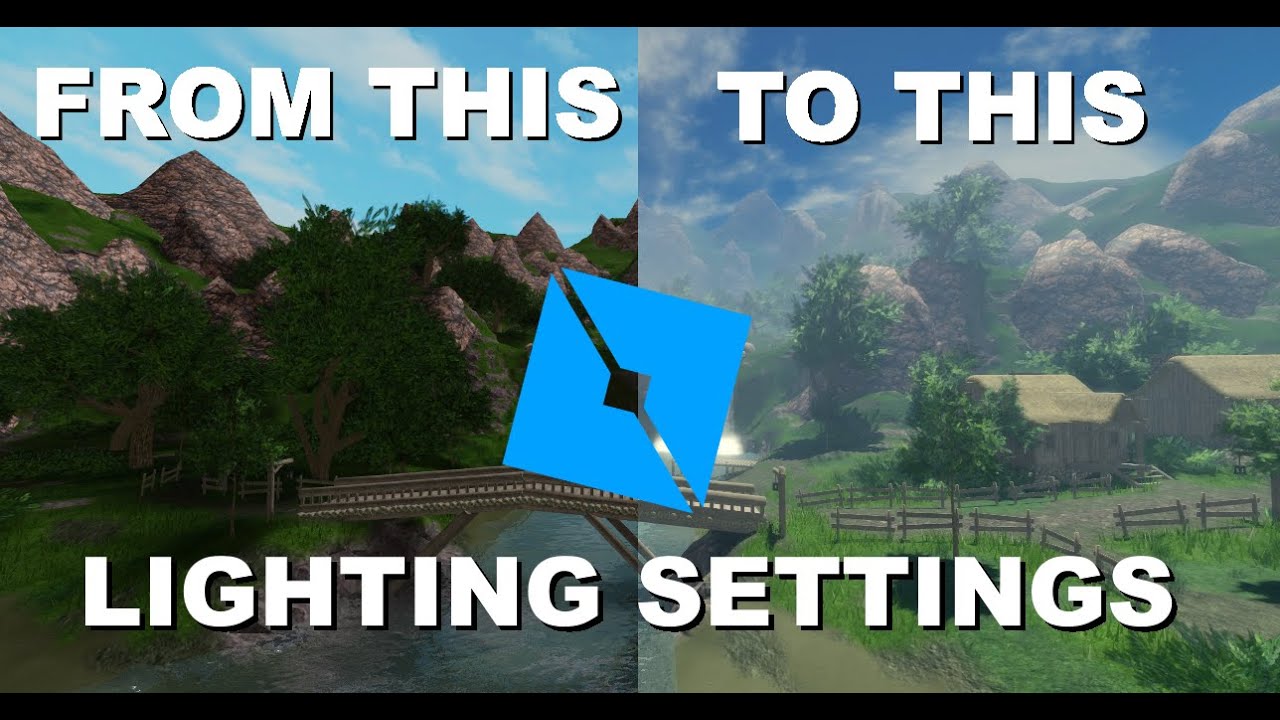
That is precisely where Roblox Studio lighting presets come into play. Imagine transforming your game's entire mood and atmosphere in just a few clicks. Whether you are aiming for a sun drenched beach, a spooky moonlit forest, or a vibrant futuristic cityscape, lighting presets offer a powerful, time saving solution. They are not just for aesthetics either; well optimized lighting can significantly impact your game's performance, ensuring a smoother experience for all players, especially those on mobile devices or older hardware. This guide is designed to empower you with the knowledge to leverage Roblox Studio's lighting capabilities effectively, helping you create visually stunning, high performance games without sacrificing your precious free time. Let us dive in and illuminate your Roblox development journey.
What Exactly Are Roblox Studio Lighting Presets?
Roblox Studio lighting presets are essentially pre-configured collections of lighting properties that can be applied to your game's environment to quickly establish a specific mood or visual style. Think of them like filters for your game world. Instead of manually adjusting individual settings such as Brightness, OutdoorAmbient, ColorCorrection, or shadows, a preset bundles these various properties together. When you apply a preset, all these interconnected settings are updated simultaneously, giving your game an instant and cohesive atmospheric makeover. They are a fundamental tool for achieving consistent visual themes and saving developers countless hours of trial and error.
For the busy adult gamer who moonlights as a developer, these presets are a godsend. They allow you to rapidly prototype different looks or achieve a polished aesthetic for your final product without getting bogged down in the minute details. This efficiency is critical for those who have limited time slots for their creative endeavors, ensuring they can make significant progress in shorter bursts.
Why Should Busy Developers Use Lighting Presets?
In the fast paced world of Roblox development, where competition for player attention is fierce, standing out visually is paramount. However, not everyone has unlimited time to painstakingly craft perfect lighting. This is why lighting presets are indispensable for creators, especially those who balance gaming with jobs and family responsibilities. Here are a few key reasons why you should embrace them:
- Time Efficiency: This is the biggest draw. Instead of adjusting dozens of properties one by one, a preset applies a complete look instantly. This means more time for gameplay design, scripting, or social engagement within your game communities.
- Visual Consistency: Presets help maintain a uniform aesthetic across different areas of your game or even multiple projects. This consistency contributes to a more professional and immersive player experience.
- Performance Optimization: Many presets are designed with performance in mind. Using optimized lighting configurations can prevent your game from lagging on lower-end devices, which is crucial given Roblox's diverse player base, including a significant mobile audience. Getting maximum visual impact with minimal performance cost is a win win.
- Ease of Experimentation: Rapidly switch between different moods—day, night, foggy, futuristic—to see what best fits your game's theme. This encourages creative exploration without the commitment of a full manual overhaul.
- Learning Tool: By observing how different presets manipulate various lighting properties, you can deconstruct and understand advanced lighting techniques more effectively, helping you build your skill set over time.
For US gamers who value skill building and performance optimization, understanding and utilizing these presets is a smart investment in their creative toolkit. It allows them to deliver high quality content that resonates with a broad audience, including the many players who enjoy social gaming and competitive experiences.
How Do I Apply a Lighting Preset in Roblox Studio?
Applying a Roblox Studio lighting preset is a straightforward process, making it accessible even for those new to advanced development. Follow these steps to transform your game's atmosphere:
Open Your Project: Launch Roblox Studio and open the game place you wish to modify.
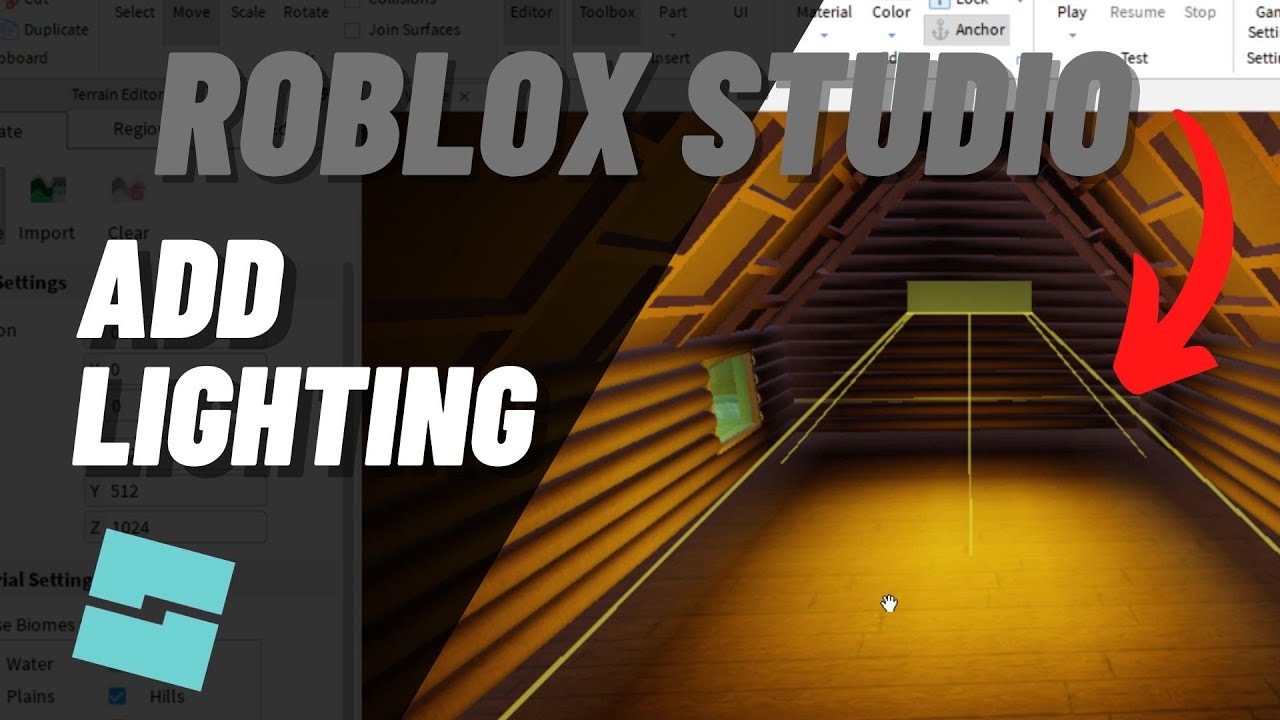
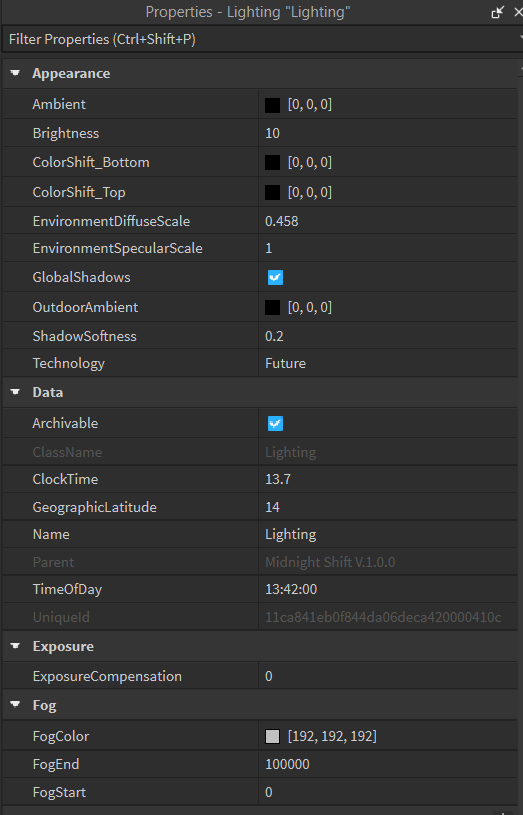
Locate the Lighting Service: In the 'Explorer' window, scroll down and find the 'Lighting' service. This is a crucial object that controls all global lighting properties for your game.
Access Properties: Select the 'Lighting' service. Then, in the 'Properties' window (usually located below the Explorer), you will see a comprehensive list of properties related to your game's lighting.
Choose a Lighting Technology: The 'Technology' property is often the most impactful. You can choose from options like 'Legacy', 'Voxel', 'ShadowMap', and 'Future'. 'Future' offers the most realistic and advanced lighting with global illumination, while 'ShadowMap' provides a balanced approach with good performance. Experiment to see the immediate visual difference.
Adjust Key Properties: While there isn't a single 'apply preset' button for built-in themes, you can mimic them by adjusting groups of properties. For example, to achieve a 'Night' effect, you would typically lower 'Brightness', adjust 'OutdoorAmbient' to a darker blue or purple hue, and set 'TimeOfDay' accordingly. For a 'Sunny Day', you would increase 'Brightness', use a light blue 'OutdoorAmbient', and set 'TimeOfDay' to a midday value.
Utilize Additional Effects: For more dramatic changes, explore 'Atmosphere' (for fog and haze), 'ColorCorrection' (for color grading like sepia or cool tones), 'Blur', and 'DepthOfField' (for camera focus effects). These effects, when combined, create a complete preset look.
Remember, the goal is to quickly achieve a desired look. Do not be afraid to play around with these settings. The beauty of Studio is that you can see changes in real time, allowing for rapid iteration and creative flow.
Can I Customize a Preset After Applying It?
Absolutely, and this is where the real power of Roblox Studio lighting comes into its own. Think of a preset as a starting point, a foundation upon which you can build your unique vision. Once you have applied a base lighting technology or adjusted a set of properties to create a specific look, every single property remains fully customizable.
For instance, if you start with a 'ShadowMap' setting to get good performance and decent shadows, but find the shadows a bit too stark, you can navigate to the 'ShadowSoftness' property within the 'Lighting' service and gently increase its value. Or, perhaps the 'ColorCorrection' preset you chose makes the game look a bit too warm; you can fine tune the 'Temperature' or 'Tint' properties to achieve your desired balance. This level of granular control is perfect for creators who want the efficiency of presets but still demand artistic precision. It allows you to address specific visual needs without having to start from scratch. This flexibility is particularly useful for adult gamers who enjoy both the challenge of creation and the convenience of quick iteration, enabling them to personalize their games while respecting their limited time.
How Do I Create My Own Custom Lighting Presets?
While Roblox Studio does not have a dedicated 'Save as Preset' button for the entire 'Lighting' service configuration, you can absolutely create and reuse your custom lighting setups. This method is incredibly useful for maintaining a consistent visual style across multiple projects or sharing your unique aesthetic with others.
Here is a common and effective way to manage your custom lighting presets:
Design Your Ideal Lighting: First, spend time in your game place, adjusting all the lighting properties within the 'Lighting' service (including 'Atmosphere', 'Blur', 'ColorCorrection', etc.) until you achieve the exact look you desire. Experiment with different 'Technology' settings and individual property values.
Group Lighting Components: In the 'Explorer' window, right-click on the 'Lighting' service. While you cannot directly save the 'Lighting' service itself, you can copy all its children (like 'Atmosphere', 'ColorCorrection', 'Sky', etc.) and paste them into a Model. Alternatively, you can save a 'Lighting' object with your desired properties as a model indirectly. One common trick is to copy the 'Lighting' object, paste it into 'Workspace', then save *that* as a model.
Save as a Model: Once your carefully configured 'Lighting' object (or a model containing its key components) is in the Workspace, right-click on it and select 'Save to Roblox'. Give your model a clear, descriptive name (e.g., 'MyCustomNightLighting', 'SciFiAmbiancePreset'). You can choose to save it to your local files or publish it directly to the Creator Marketplace (for private use or to share). Make sure to set the asset as private if you do not wish to share it yet.
Reusing Your Preset: To apply this custom preset to another game, simply go to 'My Models' in the 'Toolbox', find your saved lighting model, and insert it into your new game's Workspace. Then, carefully transfer the properties from your custom Lighting model to the default 'Lighting' service in the new game, or selectively move the 'Atmosphere', 'ColorCorrection', etc., objects into the default 'Lighting' service, replacing existing ones as needed. This allows you to quickly replicate your signature look across all your creations, streamlining your development workflow.
This method ensures that your unique visual styles are always just a few clicks away, empowering you to maintain creative control and efficiency.
What Are Some Popular Lighting Styles and Their Presets?
Roblox Studio's lighting capabilities allow for an incredible range of atmospheric styles. While there aren't official 'preset names' like 'Sunny Day' built into the UI as single buttons, developers commonly achieve these looks by configuring groups of properties. Here are some popular lighting styles and the key properties or technologies often associated with them:
Realistic Daytime: Achieved primarily with 'Future' or 'ShadowMap' technology. Focus on a bright 'Brightness' (e.g., 2-3), 'OutdoorAmbient' set to a light sky blue, 'TimeOfDay' around 14:00:00 (2 PM), and 'GlobalShadows' enabled. Adding 'Atmosphere' with light scattering and haze can enhance realism, mimicking real world light dispersion. This is a popular choice for open world adventure games.
Eerie Nighttime: Often uses 'ShadowMap' or 'Voxel' for performance on darker scenes. Lower 'Brightness' significantly (e.g., 0.1-0.5), set 'OutdoorAmbient' to a deep dark blue or purple, and 'TimeOfDay' to 00:00:00 (midnight). Incorporate 'FogEnd' and 'FogColor' within 'Lighting' for a misty effect. PointLights and SpotLights with subtle colors (e.g., amber, cold blue) can create localized illumination.
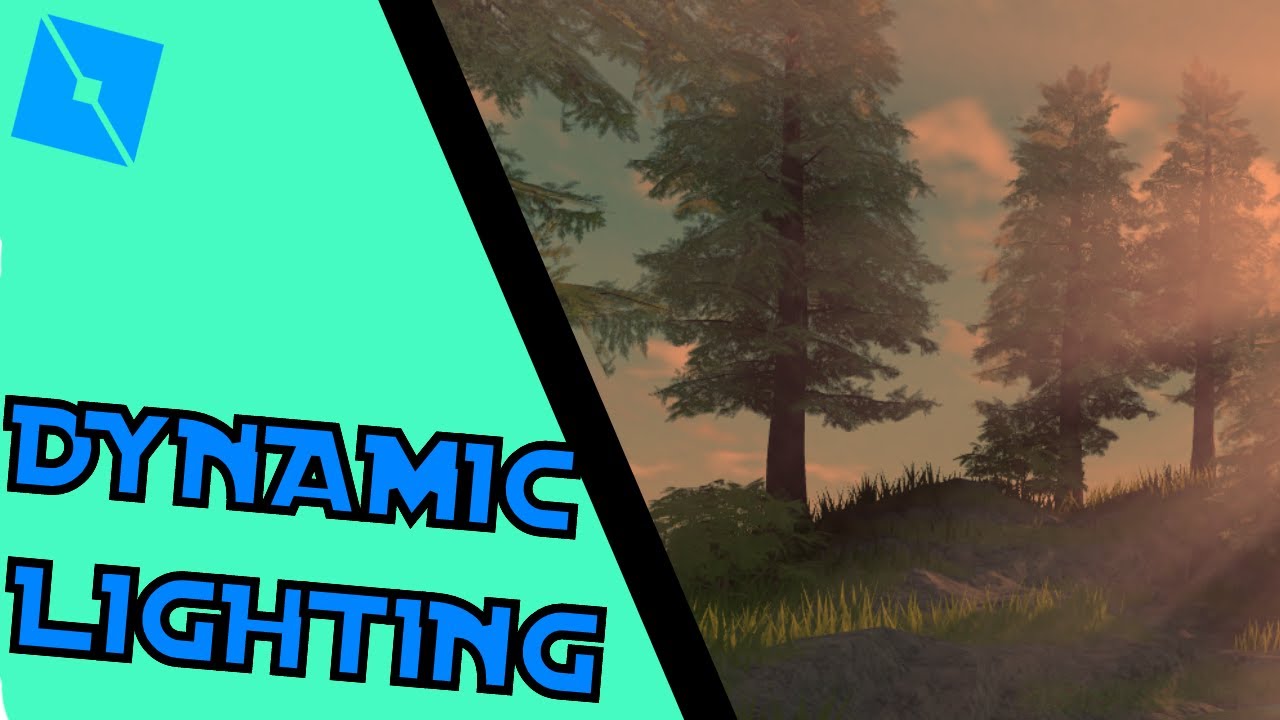
Warm Sunset/Sunrise: 'ShadowMap' or 'Future' work well here. Set 'TimeOfDay' to around 18:00:00 (6 PM) for sunset or 06:00:00 (6 AM) for sunrise. Adjust 'OutdoorAmbient' to a warm orange/red hue, and 'Brightness' to a moderate level. 'ColorCorrection' can be used to add a warm filter (increased 'Temperature' and 'Tint') to really sell the golden hour effect, which is highly sought after for social hangout games.
Cloudy/Overcast: 'Voxel' or 'ShadowMap' are good starting points. Lower 'Brightness' slightly, set 'OutdoorAmbient' to a muted gray, and disable or soften 'GlobalShadows' to reduce harsh shadows. A 'ColorCorrection' with slightly desaturated colors can enhance the cloudy feel. 'Atmosphere' with higher haze density can further diffuse the light.
Sci-Fi/Cyberpunk: Often utilizes 'Future' lighting technology for its emissive properties and intricate shadows. Combine dark 'OutdoorAmbient' with vibrant, saturated 'ColorCorrection' tints (e.g., blues, purples, neons). Strategic use of 'PointLight' and 'SpotLight' sources with intense colors to highlight glowing elements and create stark contrasts is key. Consider using 'Bloom' for a futuristic glow effect.
By understanding these common configurations, you can quickly achieve a desired look and then fine-tune it to perfection, catering to the aesthetic preferences that often trend among the creative US gamer community.
Do Lighting Presets Impact Game Performance?
Yes, absolutely. Lighting presets and the underlying lighting technologies have a significant impact on your game's performance. For many US gamers, particularly those balancing gaming with life, performance optimization is a top priority. No one wants a choppy, lagging experience, especially if they are playing on a mobile device or have not upgraded their hardware in a while.
Here is how lighting choices affect performance:
Lighting Technology: This is the most critical factor. 'Future' lighting, while offering stunning realism and global illumination, is the most performance-intensive. It requires more computational power to render complex light interactions. 'ShadowMap' provides a good balance of visuals and performance, making it a popular choice. 'Voxel' is generally less demanding, and 'Legacy' is the least demanding but visually dated. Choosing the right 'Technology' based on your target audience's devices is paramount.
Shadows: 'GlobalShadows' and the complexity of shadows (e.g., 'ShadowSoftness') consume significant resources. Highly detailed, dynamic shadows on many objects can cause noticeable framerate drops. Optimizing shadow casting objects and using simpler shadow settings can vastly improve performance.
Post-Processing Effects: Effects like 'Bloom', 'Blur', 'DepthOfField', 'Atmosphere', and 'ColorCorrection' all add to the rendering load. While they enhance visuals, using too many or setting them to very high intensities can slow down your game. A balanced approach is crucial.
Number of Light Sources: Every 'PointLight', 'SpotLight', or 'SurfaceLight' adds to the computational cost. While modern engines handle many lights, an excessive number in a small area can still impact performance, especially with 'Future' lighting.
To optimize for performance, especially for gamers who might be on a budget for hardware upgrades, consider:
Starting with 'ShadowMap' and gradually adding effects.
Using 'Future' only for smaller, graphically intense showcases or highly optimized builds.
Minimizing unnecessary light sources.
Setting post-processing effects to moderate levels.
Regularly testing your game on various devices (PC, mobile, tablet) using Roblox Studio's built-in 'Emulator' to identify bottlenecks.
A beautifully lit game that runs poorly will quickly lose players. Prioritize a smooth, enjoyable experience, and then enhance visuals within those performance boundaries.
How Can I Achieve Realistic Lighting with Presets?
Achieving realistic lighting in Roblox Studio is a goal for many developers, aiming to immerse players in believable worlds. While presets provide a starting point, fine-tuning specific properties is key to nailing that authentic look. Here is how you can leverage presets and additional settings for realism:
Start with 'Future' Technology: This is Roblox's physically-based rendering engine and the foundation for realistic lighting. It offers advanced global illumination, dynamic shadows, and more accurate light dispersion. Set your 'Lighting.Technology' to 'Future'.
Master 'TimeOfDay': Realistic light changes with the time. Use 'TimeOfDay' (e.g., 14:00:00 for bright afternoon, 06:00:00 for soft morning light) to simulate natural sun positions. Pair this with 'SunRays' (under 'Lighting' properties) for added atmospheric effect.
Calibrate 'Brightness' and 'ExposureCompensation': 'Brightness' controls the overall intensity of light. 'ExposureCompensation' helps adjust the camera's exposure, mimicking how a real camera adapts to different light levels. Play with these to avoid blown out highlights or overly dark shadows.
Refine 'OutdoorAmbient' and 'Ambient': 'OutdoorAmbient' dictates the color and intensity of ambient light from the sky. 'Ambient' provides general environmental illumination. For realism, these should be subtle and complement your main light source (the sun/moon). Think of how bounced light works in the real world.
Enhance Shadows with 'GlobalShadows' and 'ShadowSoftness': Enable 'GlobalShadows' for accurate, large scale shadows. Adjust 'ShadowSoftness' to create more natural, diffuse shadows, especially for distant objects or under overcast conditions. Harsh, pixelated shadows can break immersion.
Introduce 'Atmosphere' for Environmental Haze: The 'Atmosphere' object (insertable under 'Lighting') is vital for realism. Adjust 'Density', 'Offset', 'Color', and 'Haze' to simulate natural fog, mist, or atmospheric perspective, making distant objects appear lighter and less saturated. This adds incredible depth.
Leverage 'ColorCorrection' for Mood and Consistency: The 'ColorCorrection' object allows for color grading. Adjust 'Contrast', 'Saturation', 'Brightness', 'Temperature', and 'Tint' to fine-tune the overall color palette. For example, a slight increase in 'Temperature' for a warm, sunny day, or a decrease for a colder, moonlit night. This subtly influences player perception and mood, which social gamers often appreciate.
Strategic Use of 'Bloom': The 'Bloom' effect (insertable under 'Lighting') simulates the glow around bright light sources. Use it sparingly and with low 'Intensity' and 'Threshold' for subtle realism, like the soft halo around the sun or bright streetlights, rather than an overpowering glow.
Utilize PBR Textures: While not a lighting property, using Physically Based Rendering (PBR) textures (which include Normal, Roughness, and Metallic maps) on your models interacts beautifully with 'Future' lighting, allowing materials to reflect and scatter light realistically, significantly boosting visual fidelity.
By thoughtfully combining these elements, you can move beyond basic presets to create breathtakingly realistic lighting that truly elevates your Roblox game, making it stand out in a competitive market that increasingly values high quality visuals.
What Are the Latest Trends in Roblox Lighting for 2026?
As we move further into 2026, Roblox Studio lighting continues to evolve, driven by community innovation and platform advancements. For US gamers and creators, staying current with these trends is key to producing engaging and visually appealing experiences. Here are some of the dominant lighting trends shaping the Roblox landscape:
Hyper-Realism with Future Lighting: The push for realism remains strong. Developers are increasingly mastering 'Future' lighting technology, leveraging its global illumination and advanced shadow mapping to create environments that blur the lines between Roblox and traditional game engines. This includes intricate light bounces, volumetric effects, and highly detailed shadows that react dynamically to moving objects and time of day. This month, we have seen creators pushing the boundaries with hyper-realistic showcase builds, inspiring a new wave of visual fidelity.
Dynamic Weather and Time Cycles: Beyond static lighting, developers are integrating complex dynamic weather systems (rain, snow, fog) and seamless day-night cycles that dramatically alter lighting and atmosphere in real time. This adds immense immersion and replayability, as the game world constantly feels alive and responsive to environmental shifts. Think games where a sunny afternoon can quickly turn into a dramatic thunderstorm with corresponding lighting changes.
Stylized & Aesthetic Lighting: While realism is popular, there is also a significant trend towards highly stylized lighting. This involves using vibrant, often exaggerated color palettes through 'ColorCorrection', strong 'Bloom' effects, and creative use of colored 'PointLights' or 'SpotLights' to achieve unique, artistic looks. This is prevalent in social hangouts, role playing games, and experiences that prioritize a distinct visual identity over photorealism.
Performance-Conscious Visuals: With mobile gaming still dominating quick sessions for many US gamers, there is an ongoing focus on achieving stunning visuals without sacrificing performance. This means smart optimization techniques even with 'Future' lighting, efficient use of light sources, and carefully balanced post-processing effects. Creators are learning to get the most visual bang for their performance buck.
Interactive Lighting Elements: Players are increasingly expecting to interact with their environment, and lighting is no exception. This includes player controlled light switches, dynamic light reactions to in game events (e.g., a spell casting illuminating an area), or even lights that respond to music. Such interactivity enhances player agency and immersion.
Creator-Driven Lighting Packs: The Creator Marketplace is seeing a surge in community-made lighting asset packs and pre-configured 'Lighting' models. These allow developers to quickly import high quality, trending lighting setups, democratizing access to professional grade visuals and fostering a collaborative development environment.
By understanding and experimenting with these trends, you can ensure your Roblox creations remain fresh, engaging, and visually competitive in 2026's dynamic gaming landscape.
Troubleshooting Common Roblox Lighting Issues
Even with the best presets and intentions, lighting in Roblox Studio can sometimes throw a curveball. For busy developers, quickly identifying and fixing these issues is crucial. Here are some common lighting problems and how to troubleshoot them:
Problem: My game is too dark or too bright!
Solution: This is often a fundamental 'Brightness' or 'OutdoorAmbient' issue. In the 'Lighting' service, check 'Brightness' (should be 1-3 for daytime, lower for night) and 'OutdoorAmbient' (should reflect sky color). Also, ensure 'ExposureCompensation' is set appropriately (usually 0). If using 'Future' lighting, sometimes a lack of objects for global illumination to bounce off can make a scene dark. Try adding more surfaces.
Problem: Shadows look blocky, pixelated, or disappear.
Solution: First, verify your 'Lighting.Technology'. 'Legacy' and 'Voxel' have limited shadow quality. For better shadows, use 'ShadowMap' or 'Future'. Ensure 'GlobalShadows' is enabled. If shadows are blocky, try increasing 'ShadowSoftness'. For disappearing shadows, check the 'TimeOfDay' to ensure the sun/moon is in a position to cast them, and that objects are not too far from light sources if using specific light types.
Problem: My game lags significantly when I turn on 'Future' lighting.
Solution: 'Future' is demanding. This is a common performance issue for budget conscious gamers. Reduce the number of 'PointLight' and 'SpotLight' sources, especially those with large ranges. Limit the use of 'Bloom', 'Blur', and 'DepthOfField' to minimal settings. Ensure your models have optimized geometry (fewer triangles) and that you are not using excessive PBR textures. Consider switching back to 'ShadowMap' if performance is critical.
Problem: Colors look washed out or have an unnatural tint.
Solution: Check the 'ColorCorrection' object within your 'Lighting' service. Properties like 'Contrast', 'Saturation', 'Temperature', and 'Tint' can drastically alter the color palette. If you did not intentionally add a 'ColorCorrection' object, one might have been included with a model you imported. Remove or adjust it to achieve natural colors.
Problem: Fog looks bad or extends too far/not far enough.
Solution: Adjust the 'Atmosphere' object's properties. 'Density' controls how thick the fog is, 'Offset' changes its start point, and 'Haze' influences its overall visibility. For traditional fog, check 'Lighting.FogEnd' and 'Lighting.FogColor'. Ensure these values make sense for your scene's scale.
By systematically checking these common culprits, you can quickly get your Roblox game looking its best, ensuring a smooth and visually appealing experience for all your players.
Conclusion
Mastering Roblox Studio lighting presets is not just about making your games look pretty; it is about smart, efficient development that respects your valuable time. For the average US gamer who balances their passion with life's demands, these tools offer a direct path to stunning visuals and optimized performance without getting lost in endless tweaking. You have learned how to harness the power of built-in settings, customize them to your unique vision, and even create your own reusable presets, all while keeping an eye on performance and staying ahead of 2026's latest visual trends.
Remember, a visually captivating game runs smoothly. By understanding how lighting impacts performance and by utilizing these practical strategies, you are not just building games; you are crafting immersive, high quality experiences that will resonate with players. So go ahead, experiment with light, illuminate your worlds, and make your Roblox creations truly shine. What is your biggest gaming challenge? Comment below!
FAQ Section
What is the best lighting technology for realism in Roblox Studio?
For the most realistic lighting, use 'Future' technology in Roblox Studio. It offers advanced global illumination, dynamic shadows, and more accurate light interactions, creating highly immersive and visually rich environments that mimic real-world lighting.
Can I use external lighting presets in Roblox Studio?
While Roblox Studio does not have a direct import feature for external 'preset files', developers often share custom lighting configurations as Roblox models. You can insert these models into your game and then apply their properties or contained 'Atmosphere', 'ColorCorrection', etc., objects to your game's 'Lighting' service.
How do I make my Roblox game look brighter at night?
To make your Roblox game brighter at night, increase the 'Brightness' property within the 'Lighting' service. You can also adjust 'OutdoorAmbient' to a lighter shade, or strategically place 'PointLights' or 'SpotLights' to illuminate specific areas, creating a more visible nighttime environment.
Do Roblox lighting presets work on all devices?
Yes, Roblox lighting presets and configurations generally work on all devices. However, the visual quality and performance can vary greatly. More demanding technologies like 'Future' lighting may run smoothly on high-end PCs but could cause significant lag on older mobile devices, emphasizing the need for optimization.
What is 'Bloom' and how does it enhance Roblox lighting?
'Bloom' is a post-processing effect in Roblox Studio that creates a soft glow around bright areas and light sources, mimicking camera lens effects. When used subtly, it enhances realism by simulating how intense light can bleed into surrounding areas, making scenes feel more cinematic and vibrant.
How do I change the skybox with lighting presets?
The skybox is controlled by the 'Sky' object, which you can insert into your 'Lighting' service. While not directly a lighting preset property, custom skyboxes dramatically influence the overall ambient light and visual mood. You can change its texture IDs to use custom sky images, complementing your lighting choices.
Quickly enhance game visuals, Optimize performance with ready-to-use settings, Save development time, Understand advanced lighting techniques, Create custom atmosphere effortlessly, Improve player immersion, Leverage built-in Roblox Studio tools, Stay updated on lighting trends, Balance visual quality with game performance.
35


How To Make Realistic Lighting In Roblox Studio Updated YouTube . THE Ultimate Lighting Tutorial ADVANCED Roblox Studio YouTube . Realistic Lighting Settings ROBLOX STUDIO Tutorial YouTube . EASY How To Make Realistic Lighting Roblox Studio Tutorial YouTube . How To Make Better Lighting In Roblox Studio YouTube


How To Add A Light To A Room In Roblox Studio Realistic Lighting For A . Lighting Preset Manager Studio Lighting Presets With Real Viewport . How To Get Realistic Lighting Improved Roblox Studio YouTube . How To Make Light And Realistic Lighting In Roblox Studio . How To Make Realistic Lighting In Roblox Studio ULTIMATE GUIDE NO


How To Make Realistic Lighting In Roblox Studio YouTube . How To Add Bloom Effect To A Lighting In Roblox Studio Roblox . Lighting Settings Different In Studio When I Press Play This Also . Roblox Studio Building Tutorial Unified Lighting Explained YouTube . How To Make Realistic Lighting In Roblox Studio Roblox Studio


Roblox Lighting Tutorial Roblox Studio YouTube . How To Make Realistic Lighting In Roblox Studio YouTube . Realistic Lighting Tips In Roblox Studio YouTube . Realistic Roblox Lighting Community Tutorials Developer Forum Roblox . HOW TO GET REALISTIC LIGHTING IN ROBLOX STUDIO YouTube


Complete Guide To Roblox Lighting YouTube . Roblox Studio Realistic Lighting Tutorial YouTube Hqdefault . Roblox Studio Tutorial How To Use Lighting EASY YouTube . ROBLOX Studio Lighting Properties And Objects YouTube . How To Optimize Future Lighting Roblox Studio YouTube


How To Add A Lighting In Roblox Studio At Vivian Donnelly Blog . How To Get Lighting For Beginners Community Tutorials . How To Use Roblox Studio Lighting Guide YouTube . Make Classic Lighting Roblox Studio YouTube . Lighting Preset Manager Studio Lighting Presets With Real Viewport


-7b56-original.jpg)

Roblox How To Make Realistic Lighting Roblox Studio . Roblox Studio How To Make Realistic Lighting 2021 YouTube . Lighting Presets The Lighting Loading Plugin Community Resources . Cara Optimalkan Lighting Environment Di Roblox Studio Lrs 1 %5B1%5D (17) 7b56 Original . How To Make Better Lighting In Roblox Studio YouTube